スタイル変換とは
kerasを使用して画像のスタイル変換を行ってみます。
スタイル変換とはコンテンツ画像に書かれた物体の配置をそのままに、元画像のスタイルだけをスタイル画像のものに置き換えたものです。
gitで公開されているKerasのサンプルプロラムを使用してスタイル変換を行ってみます。
input画像(フリー画像)

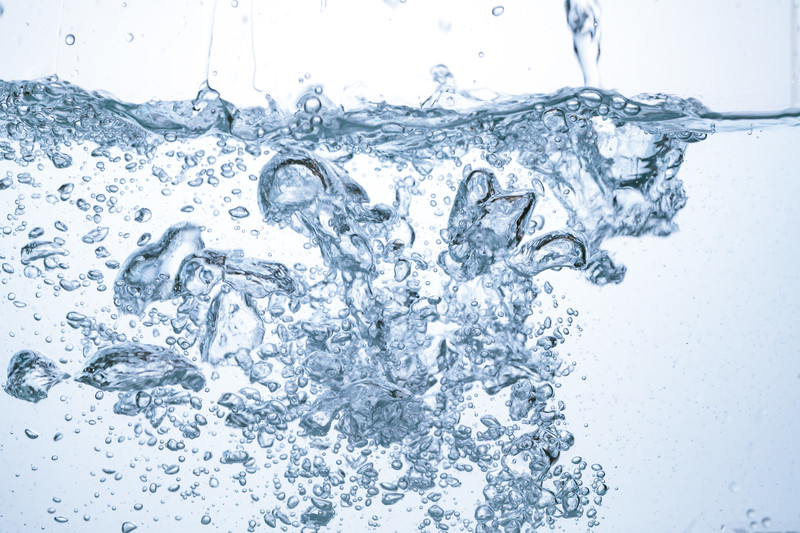
style画像(フリー画像)
output画像(変換画像)

葛飾北斎風やピカソ風、ゴッフォ風など定番のスタイル変換もできますが、写真のようにちょっと変わったスタイルにも変換することが出来ます。
今回は画像を加工するプログラムのため、Google Colaboratoryを使用していきます。
Google Colaboratoryとは
Google ColaboratoryとはGoogle社で提供しているクラウドサービスです。
ブラウザとインターネットがあれば、どこでも使用することが可能です。
特別なインストール不要で簡単に環境を構築できることが特徴で、機械学習や人工知能の作成に必要なPythonやJupyter Notebookなどが予めインストールされています。
今回使用するkerasについてもインストール済みなので、非常に短時間で環境を作成することができます。
また、画像加工には処理時間がかかってしまいますが、無料でGPUを使用可能のため、CPUにくらべ高速に動作させることが可能です。
Google Colaboratoryのメリット
- ブラウザとインターネットがあれば、どこでも使用可能
- 環境構築がほぼ不要
- GPU環境が無料で利用可能
- Googleアカウントがあればすぐにでも実行可能
Google Colaboratoryの使い方
GoogleアカウントでGoogle Colaboratoryのサイトにアクセスします。
Google Colaboratory
「PYTHON3」の新しいノートブックを選択し、「ランタイム」⇒「ランタイムのタイプの変更」を選択します。
出力されたダイアログのハードウェアアクセラレーターでGPUを選択し保存します。
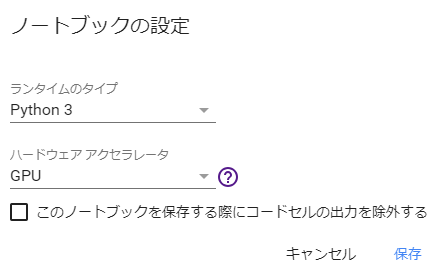
以上で準備は完了です。
次から実際にソースコードを記載していきます。
ソースコード実行に必要なもの
スタイル変換を行う元画像と、スタイル画像の2つの画像が必要です。
スタイル画像といっても特別な画像である必要はありません。
- 元画像 スタイル変換を行う元画像(今回はinput_1.pngという名前)
- スタイル画像 スタイル変換を行う画像(今回はstyle_1.pngという名前)
ソースコード
|
1 2 |
import keras print(keras.__version__) |
|
1 2 |
Using TensorFlow backend. 2.1.6 |
バージョンは次のコードで使用します。
|
1 |
!git clone -b 2.1.6 https://github.com/keras-team/keras.git |
gitで公開されているKerasのサンプルプロラムをクローンします。
バージョンを指定しているのは、バージョン毎にコードが異なるときがあり、動かない可能性があるためです。
git clone -b以降の数値はkerasのバージョンを指定しています。各環境に合わせ修正してください。
|
1 2 |
import os os.chdir('/content/keras/examples') |
実行したいプログラムは/content/keras/examples配下にあるためパスを移動しています。
|
1 |
!ls |
|
1 2 3 4 5 6 7 8 9 10 11 12 13 14 15 16 17 18 19 20 21 |
addition_rnn.py mnist_acgan.py antirectifier.py mnist_cnn.py babi_memnn.py mnist_dataset_api.py babi_rnn.py mnist_denoising_autoencoder.py cifar10_cnn_capsule.py mnist_hierarchical_rnn.py cifar10_cnn.py mnist_irnn.py cifar10_cnn_tfaugment2d.py mnist_mlp.py cifar10_resnet.py mnist_net2net.py conv_filter_visualization.py mnist_siamese.py conv_lstm.py mnist_sklearn_wrapper.py deep_dream.py mnist_swwae.py image_ocr.py mnist_tfrecord.py imdb_bidirectional_lstm.py mnist_transfer_cnn.py imdb_cnn_lstm.py neural_doodle.py imdb_cnn.py neural_style_transfer.py imdb_fasttext.py pretrained_word_embeddings.py imdb_lstm.py README.md lstm_seq2seq.py reuters_mlp.py lstm_seq2seq_restore.py reuters_mlp_relu_vs_selu.py lstm_stateful.py variational_autoencoder_deconv.py lstm_text_generation.py variational_autoencoder.py |
移動したパスのディレクトリ一覧を参照しています。
neural_style_transfer.pyというファイルが存在するか確認してください
このneural_style_transfer.pyのファイルが実際にスタイル変換する実行ファイルになります。
|
1 |
!mkdir input output style |
ディレクトリを生成しています。
生成しているディレクトリはinputディレクトリ、outputディレクトリ,styleディレクトリの3つでそれぞれに画像を格納していきます。
|
1 |
!ls |
|
1 2 3 4 5 6 7 8 9 10 11 12 13 14 15 16 17 18 19 20 21 22 23 |
addition_rnn.py mnist_cnn.py antirectifier.py mnist_dataset_api.py babi_memnn.py mnist_denoising_autoencoder.py babi_rnn.py mnist_hierarchical_rnn.py cifar10_cnn_capsule.py mnist_irnn.py cifar10_cnn.py mnist_mlp.py cifar10_cnn_tfaugment2d.py mnist_net2net.py cifar10_resnet.py mnist_siamese.py conv_filter_visualization.py mnist_sklearn_wrapper.py conv_lstm.py mnist_swwae.py deep_dream.py mnist_tfrecord.py image_ocr.py mnist_transfer_cnn.py imdb_bidirectional_lstm.py neural_doodle.py imdb_cnn_lstm.py neural_style_transfer.py imdb_cnn.py output imdb_fasttext.py pretrained_word_embeddings.py imdb_lstm.py README.md input reuters_mlp.py lstm_seq2seq.py reuters_mlp_relu_vs_selu.py lstm_seq2seq_restore.py style lstm_stateful.py variational_autoencoder_deconv.py lstm_text_generation.py variational_autoencoder.py mnist_acgan.py |
再度、ディレクトリ一覧を参照しています。
先ほど作成した、input,output,styleの3つのディレクトリが存在することを確認してください
|
1 2 |
from google.colab import files uploaded = files.upload() |
ファイルのアップロードダイアログが表示されます。
変換したい元画像を選択して下さい
今回はinput_1.pngという画像ファイルを指定しています。
|
1 2 |
from google.colab import files uploaded = files.upload() |
ファイルのアップロードダイアログが表示されます。
変換したいスタイル画像を選択して下さい
今回はstyle_1.pngという画像ファイルを指定しています。
|
1 |
mv input_1.png input/ |
先ほどアップロードしたinput_1.pngという元画像をinputディレクトリに移動しています。
|
1 |
mv style_1.png style/ |
先ほどアップロードしたstyle_1.pngというスタイル画像をstyleディレクトリに移動しています。
|
1 |
!python neural_style_transfer.py input/input_1.png style/style_1.png output/output_1 |
スタイル変換を行うneural_style_transfer.pyを実行します。
引数としてinput,style,outputの3つを指定します。
- input/input_1.png・・・先ほどアップロードしたinput_1.png
- style/style_1.png・・・先ほどアップロードしたstyle_1.png
- output/output_1・・・outputディレクトリにoutput_1から始まる10枚画像が生成されます。
|
1 2 3 4 5 6 7 8 9 10 11 12 13 14 15 16 17 18 19 20 21 22 23 24 25 26 27 28 29 30 31 32 33 34 35 36 37 38 39 40 41 42 43 44 45 46 47 48 49 50 51 52 53 54 55 |
Using TensorFlow backend. Downloading data from https://github.com/fchollet/deep-learning-models/releases/download/v0.1/vgg19_weights_tf_dim_ordering_tf_kernels_notop.h5 80142336/80134624 [==============================] - 19s 0us/step 2018-09-06 12:56:52.927108: I tensorflow/stream_executor/cuda/cuda_gpu_executor.cc:897] successful NUMA node read from SysFS had negative value (-1), but there must be at least one NUMA node, so returning NUMA node zero 2018-09-06 12:56:52.927636: I tensorflow/core/common_runtime/gpu/gpu_device.cc:1405] Found device 0 with properties: name: Tesla K80 major: 3 minor: 7 memoryClockRate(GHz): 0.8235 pciBusID: 0000:00:04.0 totalMemory: 11.17GiB freeMemory: 11.10GiB 2018-09-06 12:56:52.927680: I tensorflow/core/common_runtime/gpu/gpu_device.cc:1484] Adding visible gpu devices: 0 2018-09-06 12:56:53.333480: I tensorflow/core/common_runtime/gpu/gpu_device.cc:965] Device interconnect StreamExecutor with strength 1 edge matrix: 2018-09-06 12:56:53.333540: I tensorflow/core/common_runtime/gpu/gpu_device.cc:971] 0 2018-09-06 12:56:53.333569: I tensorflow/core/common_runtime/gpu/gpu_device.cc:984] 0: N 2018-09-06 12:56:53.333857: I tensorflow/core/common_runtime/gpu/gpu_device.cc:1097] Created TensorFlow device (/job:localhost/replica:0/task:0/device:GPU:0 with 10759 MB memory) -> physical GPU (device: 0, name: Tesla K80, pci bus id: 0000:00:04.0, compute capability: 3.7) Model loaded. WARNING:tensorflow:Variable += will be deprecated. Use variable.assign_add if you want assignment to the variable value or 'x = x + y' if you want a new python Tensor object. Start of iteration 0 Current loss value: 3238711600.0 Image saved as output/output_1_at_iteration_0.png Iteration 0 completed in 22s Start of iteration 1 Current loss value: 2280167700.0 Image saved as output/output_1_at_iteration_1.png Iteration 1 completed in 18s Start of iteration 2 Current loss value: 2010551200.0 Image saved as output/output_1_at_iteration_2.png Iteration 2 completed in 18s Start of iteration 3 Current loss value: 1883679000.0 Image saved as output/output_1_at_iteration_3.png Iteration 3 completed in 19s Start of iteration 4 Current loss value: 1800798700.0 Image saved as output/output_1_at_iteration_4.png Iteration 4 completed in 19s Start of iteration 5 Current loss value: 1742291000.0 Image saved as output/output_1_at_iteration_5.png Iteration 5 completed in 19s Start of iteration 6 Current loss value: 1702672100.0 Image saved as output/output_1_at_iteration_6.png Iteration 6 completed in 18s Start of iteration 7 Current loss value: 1673670100.0 Image saved as output/output_1_at_iteration_7.png Iteration 7 completed in 18s Start of iteration 8 Current loss value: 1652728600.0 Image saved as output/output_1_at_iteration_8.png Iteration 8 completed in 18s Start of iteration 9 Current loss value: 1634570200.0 Image saved as output/output_1_at_iteration_9.png Iteration 9 completed in 19s |
|
1 2 3 |
from PIL import Image img = Image.open('input/input_1.png') img |

元画像を表示しています。
|
1 2 3 |
from PIL import Image img = Image.open('style/style_1.png') img |

スタイル画像を表示しています。
|
1 2 3 |
from PIL import Image img = Image.open('output/output_1_at_iteration_9.png') img |

最終的に生成された画像を表示しています。
スタイル画像に水中の写真を指定しているため、出力された写真は水っぽい写真背景となっています。
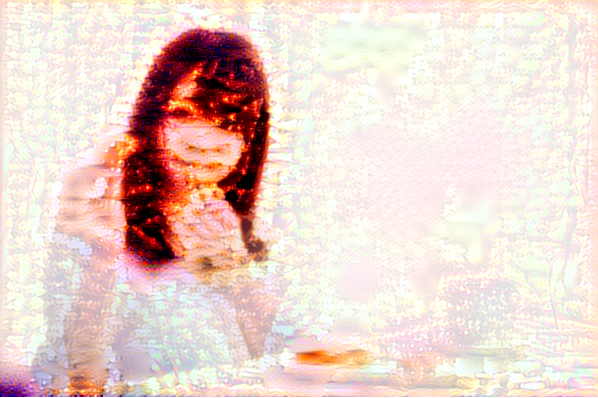
水の場合は試してみたので、炎の場合についても試してみました。
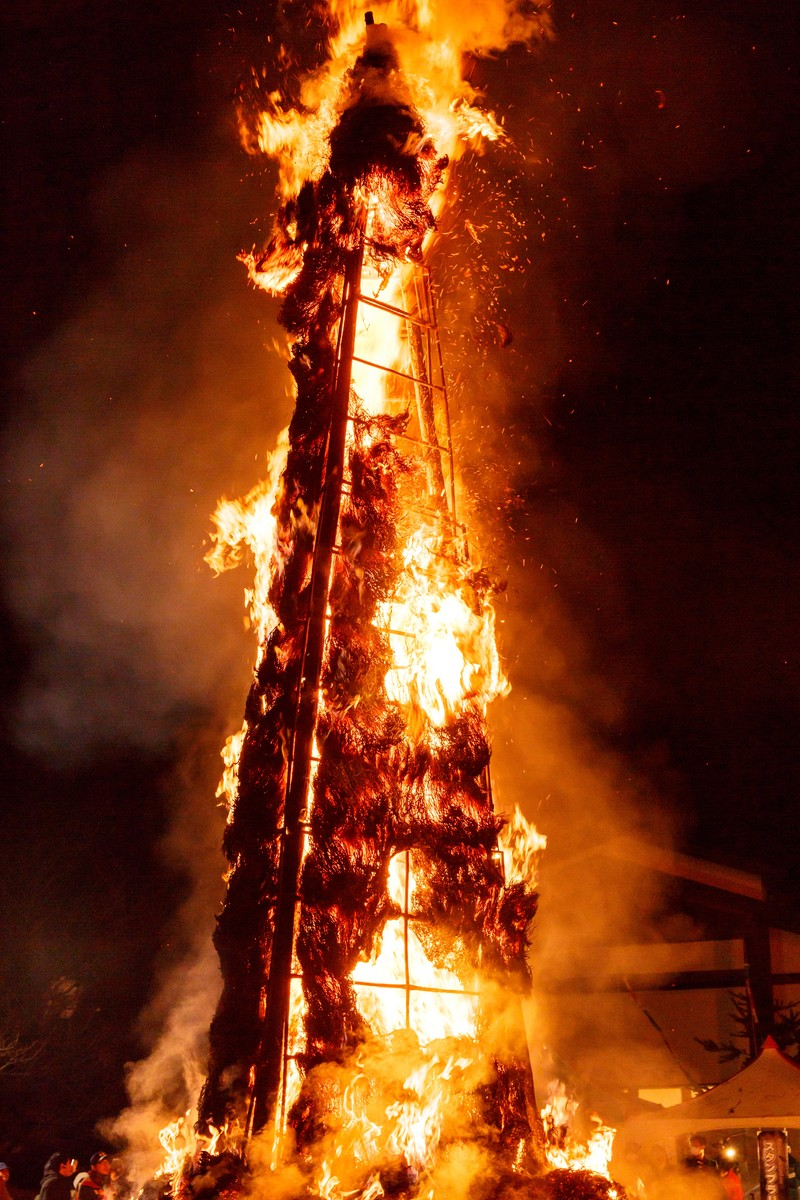
あまり炎らしさはありませんが、不思議な写真が出来上がりました。
もちろん葛飾北斎風やピカソ風、ゴッフォ風など定番のスタイルを指定することで、それらしい写真ができます。
Google Colaboratoryを使用することで非常に簡単に確かめることができるので、いろいろ試してみてください。